|
|
|
|
Repairing the
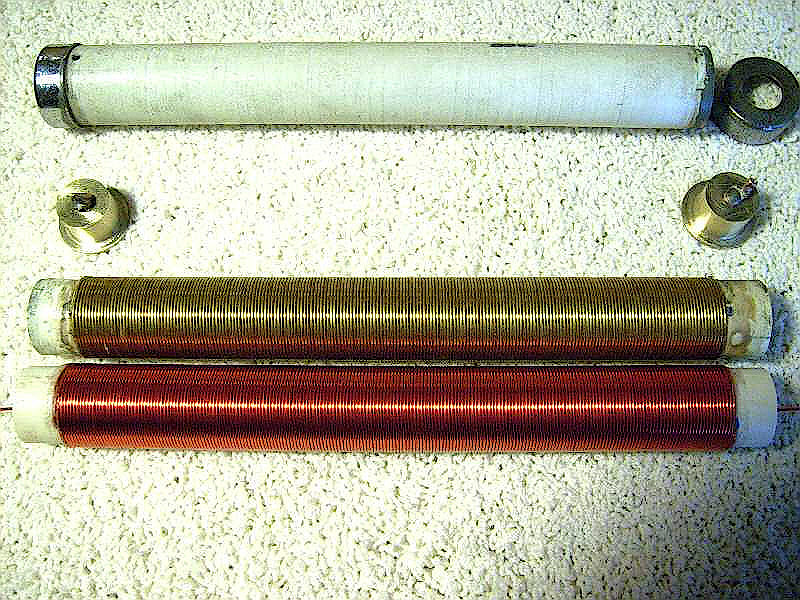
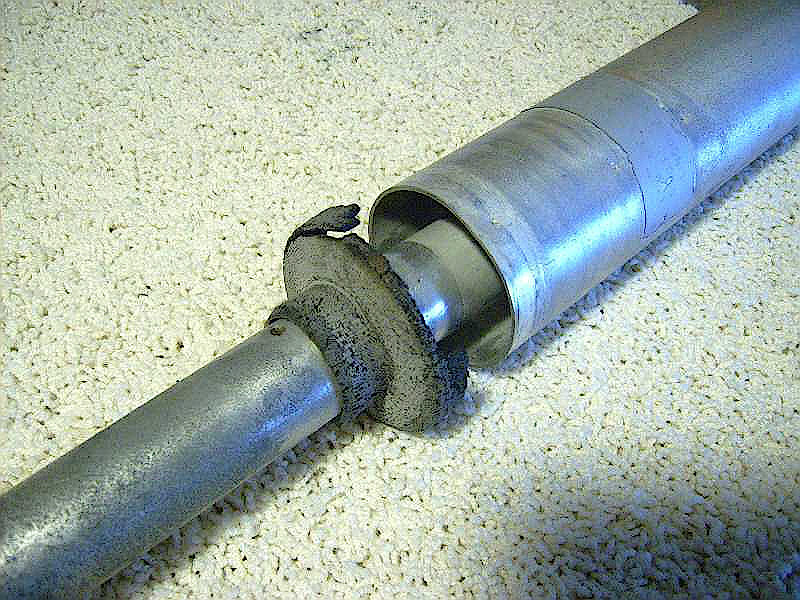
Hy-Gain HF 18AVT Fence Mounted Vertical Introduction I was experimenting with this installation on my new chain-link fence (used as the counterpoise). It worked very well until winter hit that caused the AVT to suffer damage from high winds and freezing temperatures. Even though Ohio had the mildest winter ever, we still got a few serious wind events. The ATV top-hat spun in the wind. I could see from the ground the top-hat was loose indicating the aluminum tube insert-nut failed allowing free spinning. As you will read there was even more problems; here is my detailed how-I-fixed the 18AVT making it once again mechanically sound insuring many more decades of GOOD DX'ing. MFJ/Hy-gain does NOTsell replacement aluminum tube with insert. Once again MFJ Quality failed me as they even sent me the wrong diameter tube. After some badgering they relented and sent me the proper diameter tube (at no cost). With a 3/8"- 24 one inch barrel nut and propane torch I heated the tube, then pressed the nut down inside the tube until flush with the tube end. That fixed the top most tube that affixes the top-hat to the AVT body. During this top-hat repair I checked the 80m coil - finding it open. MFJ-Hy-gain does NOTsell replacement parts for this coil. I took the 80m coil apart to discover both brass 3/8"-24 caps must have spun inside the coil body as the coil solid wires had snapped off the caps. It looks like the glue used had let loose holding the coil form to the brass end caps allowing the wires to be twisted off. The coil form was also cracked and very thin. The form required replacing which meant I would have to build a new coil. I had to dig deep into my bag of mechanical tricks to find a coil form that is 1.00" in diameter. I had an epiphany to measure 3/4" PVC and found it was a perfect 1.00" OD plus thicker walls too. Eureka my new coil form!
See the rest of this article in PDF form here! Adobe Reader required. Also see an earlier article on how to add 17 meters to this antenna and more!
  Hamuniverse.com uses Green Geeks Web Hosting! |